How to Winterize Your Backflow Preventer in Minnesota
Why Winterizing Your Backflow Preventer Is Critical in Minnesota
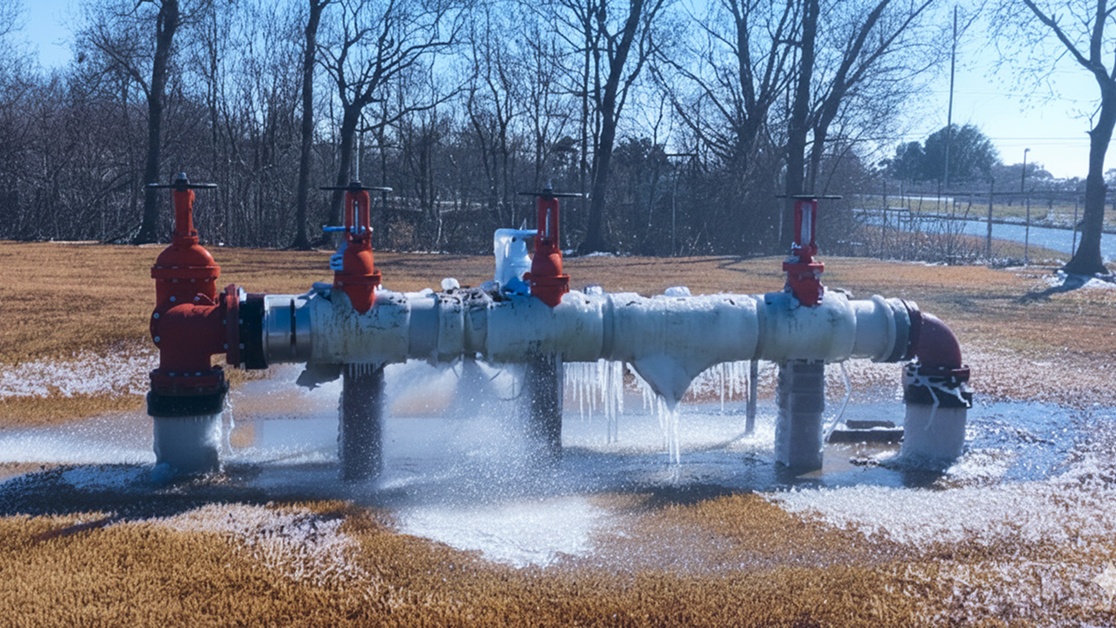
Freeze damage is the number one cause of backflow preventer failure in Minnesota. Rochester regularly sees temperatures plunge below -10°F in January and February, and even a single night of sub-freezing weather can destroy an unprotected device.
When water trapped inside a backflow preventer freezes, it expands with tremendous force — enough to crack brass and bronze housings, shatter internal check valves, rupture connecting piping, and destroy rubber seals and O-rings. A device that costs $75-$150 to test annually can cost $800 to $2,000+ to replace after freeze damage.
The math is simple: spending $50-$100 on proper winterization saves you from a potential four-figure replacement bill. For property owners in Rochester, Byron, Stewartville, and Kasson, winterization isn't optional — it's essential insurance for your plumbing infrastructure.
This guide walks you through everything you need to know about protecting your backflow preventer before Minnesota's winter arrives.
Which Backflow Preventers Need Winterization?
Not every backflow preventer requires the same level of winter protection. Here's how to assess your situation:
MUST be winterized (non-negotiable): - Irrigation system PVBs (Pressure Vacuum Breakers) — These are the most common residential devices needing winterization. They're mounted above ground on irrigation supply lines and are completely exposed to the elements. - Irrigation system RPZ assemblies — Larger devices on commercial irrigation systems. Since the irrigation system is shut down for winter, these must be fully drained. - Any above-ground outdoor device not in use during winter — If water isn't flowing through it, it must be drained.
Need insulation or protection: - Building service RPZ or DCVA devices mounted outdoors — These remain in service year-round but are exposed to freezing temperatures. They need insulated enclosures, heat tape, or protective covers. - Devices in unheated basements, crawl spaces, or mechanical rooms — If the space can reach 32°F or below, the device is at risk.
Generally safe without winterization: - Indoor devices in heated spaces — Devices inside heated buildings with consistent temperatures above 40°F are typically safe. - Below-grade vault installations — Devices installed in underground vaults below the frost line (42 inches in Rochester) are naturally protected.
If you're unsure about your device, a certified backflow professional can assess your specific installation and recommend the right protection.
Step-by-Step: How to Winterize an Irrigation System Backflow Preventer
This is the most common winterization scenario for Rochester homeowners. Follow these steps carefully — or better yet, have a professional handle it:
Step 1: Shut off the water supply Locate the shut-off valve that feeds your irrigation system (usually inside the house or in the basement). Turn it fully closed. This isolates the backflow preventer from the pressurized water supply.
Step 2: Blow out the irrigation lines Before draining the backflow preventer, the irrigation lines themselves must be cleared of water using compressed air. This requires an air compressor capable of 40-80 PSI (the exact pressure depends on your system — too much can damage PVC pipes). This step is best left to professionals, as over-pressurizing can crack pipes and fittings underground.
Step 3: Open the test cocks Using a flathead screwdriver, open all test cocks on the backflow preventer to the half-open (45-degree) position. This allows trapped water to drain out and air to enter, preventing a vacuum seal that could hold water inside.
Step 4: Open the drain/bleeder valves If your device has drain or bleeder valves, open them fully to release any remaining water from the body of the device.
Step 5: Position the shut-off valves Leave the upstream and downstream shut-off (gate or ball) valves in a partially open position (45-degree angle). This prevents water from being trapped between a closed valve and the device body, which would freeze and crack the valve or pipe.
Step 6: Verify drainage Visually confirm that no water is dripping from any port. On cold mornings, check again — residual moisture can collect and freeze.
Important: Never use antifreeze in a backflow preventer connected to a potable water system. Antifreeze can contaminate your drinking water supply when the system is reactivated in spring.
Protecting Year-Round Backflow Preventers from Freezing
Building service backflow preventers that remain active during winter need a different approach — you can't drain them because water must continue flowing. Instead, you need to insulate and protect them:
Insulated Enclosures (Best Option): Purpose-built insulated enclosures (sometimes called "backflow preventer covers" or "hot boxes") surround the device and maintain above-freezing temperatures. Options include: - Fiberglass enclosures with foam insulation — effective down to about 0°F - Aluminum enclosures with electric heat — effective in extreme cold, ideal for Rochester's climate - Heated enclosures with thermostatic controls — automatically activate when temperatures drop below a set point
Heat Tape / Heat Cable: Self-regulating heat tape wrapped around the device and exposed piping provides freeze protection. Key tips: - Use UL-listed, self-regulating heat cable rated for outdoor plumbing use - Wrap the cable around all exposed metal surfaces, test cocks, and connecting piping - Cover the heat tape with foam pipe insulation to retain heat - Connect to a GFCI-protected outdoor outlet - Check the cable each fall to ensure it's functioning before cold weather arrives
Insulation Wraps (Minimum Protection): Foam pipe insulation and insulation bags provide basic protection but may not be sufficient during Rochester's coldest nights (below -10°F). Use these as supplemental protection, not your sole defense.
What to avoid: - Don't wrap devices in plastic tarps alone — plastic doesn't insulate - Don't pack straw or hay around devices — it holds moisture and can cause corrosion - Don't assume a south-facing wall provides enough warmth — Rochester wind chills can reach -30°F
When to Winterize: Rochester, MN Timeline
Timing matters. Winterize too early and you lose weeks of irrigation. Wait too long and a surprise freeze can destroy your device. Here's the recommended timeline for the Rochester area:
Late September: - Begin monitoring weather forecasts for overnight lows approaching 32°F - Schedule your winterization appointment with a professional (they book up fast in October) - Order any insulation materials or enclosures you need
Early to Mid-October: - This is the ideal window for irrigation system winterization in Rochester - Blow out irrigation lines and drain backflow preventers - Install or verify insulated enclosures on year-round devices - Test heat tape and replace any defective units
Late October to Early November: - Final deadline for winterization — Rochester's first hard freeze typically arrives between late October and mid-November - Verify all devices are properly protected - Double-check that all drain valves and test cocks are in the correct position
Historical context: Rochester's average first freeze date is around October 5, but hard freezes (below 28°F) that can damage backflow devices typically don't arrive until late October or November. However, early cold snaps do happen — in some years, Rochester has seen temperatures below 20°F in October. Don't gamble with your device.
Spring reactivation: Plan to have your system reactivated and your annual backflow test performed in late April or May, after the risk of overnight freezing has passed. The average last freeze in Rochester is around April 29.
Common Winterization Mistakes That Cause Freeze Damage
Even well-intentioned property owners make mistakes that lead to freeze damage. Avoid these common pitfalls:
1. Forgetting to drain ALL the water A partially drained device is almost as vulnerable as one that's not drained at all. Water pooling in low spots, trapped behind closed valves, or sitting in the relief valve chamber will freeze and expand. Open every test cock, drain, and bleeder — and leave them open all winter.
2. Closing shut-off valves completely This is counterintuitive, but shut-off valves should be left partially open (45°) during winter. A fully closed valve can trap water between the valve seat and the device body, and that trapped water will freeze.
3. Relying on insulation alone in extreme cold Foam insulation slows heat loss but doesn't generate heat. During extended sub-zero periods (common in Rochester from December through February), insulation alone won't prevent freezing for year-round devices. You need active heat — heat tape or a heated enclosure.
4. Waiting until the first freeze to winterize By the time you see frost on your windshield, it may be too late. Water in an exposed backflow preventer can freeze at the same temperature that frosts your car. Schedule winterization before the first freeze, not after.
5. DIY irrigation blowouts without proper equipment Using a small shop compressor to blow out irrigation lines often leaves water in the system. Professional irrigation companies use high-volume compressors that can clear every zone thoroughly. The $75-$100 cost is worth it.
6. Not checking on devices during winter After a severe cold snap, take 60 seconds to visually inspect your device. Look for cracks, displaced piping, or ice formation. Catching damage early can prevent further deterioration.
Professional Winterization vs. DIY: What Rochester Homeowners Should Know
While basic winterization steps are straightforward, there are good reasons to hire a professional:
When to hire a professional: - You have an RPZ assembly (more complex internal components than a PVB) - Your irrigation system requires a compressed air blowout - You're unsure about the correct valve positions for your specific device - Your device is in a hard-to-reach location - You want the work done correctly the first time with no risk of freeze damage
Typical professional winterization costs in Rochester: - Irrigation blowout + backflow winterization: $75 – $125 - Backflow preventer winterization only: $50 – $75 - Heat tape installation: $150 – $300 (one-time cost) - Insulated enclosure installation: $200 – $500 (one-time cost)
Compare that to the cost of freeze damage: - Backflow preventer replacement (device + installation): $800 – $2,000+ - Burst pipe repair: $500 – $1,500 - Water damage from a burst pipe: $1,000 – $10,000+
The investment in proper winterization pays for itself many times over. For year-round maintenance tips and more on protecting your investment, see our complete maintenance guide.
Ready to schedule winterization for your Rochester, Byron, Stewartville, or Kasson property? Contact us today or call (507) 353-4071 to book before the cold arrives.
Need Backflow Testing in Rochester?
Our certified technicians provide professional backflow testing, repair, and certification for homes and businesses throughout Rochester, MN.